Import Changes
Import Changes
Sometimes, while working on a project, you need to make changes to the schematic and then update your board, to incorporate them.
It's easy to do this with EasyEDA.
Go to the PCB Editor, via: Top Meun > Design > Import Changes

If there are some errors at schematic, such as prefix duplicated, no footprint, it will pop up notice dialog, the more information please refer: Schematic - Convert to PCB
If no errors, you will get a "Confirm Importing changes information" dialog:
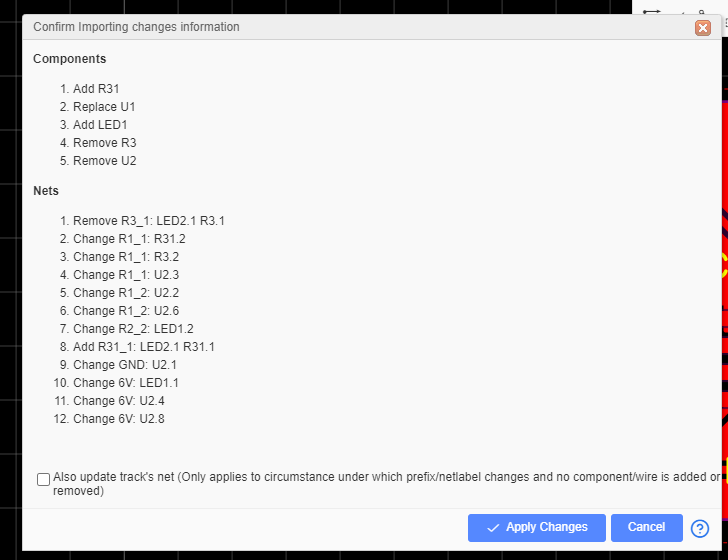
If you are happy with your changes, just click the Apply Change button.
If you want to update the PCB tracks net same as the schemtiac, you need to enable "Also update track's net" option. The editor will update the related track's net depends on the pad's net.
The changes will then be passed into the PCB layout and you can then adjust the tracking to suit.
Notice:
- Because of the net of the schematic is generated after calculating, when you change some netlabel, after Import Changes, the PCB track will not be deleted.
- When enable the "Also update track's net" option, after Import Changes, the related tracks vias will update the net from the pads, there will be some nets changed isn't you want, you need to change them manually, such change prefix, modify the parts connection, delete or add part at the schematic, you can change the tracks net via: right-click the track - click Select menu - Connection, and them all connection will be seleted, you can change them net at the right-hand property panel.
- After Import Changes, there are some action can not be undo.