Footprint Manager
Introduction
Want to batch modify components? Can't identify the corresponding relationship between component pins and footprint pins? Don't worry, EasyEDA can do this.
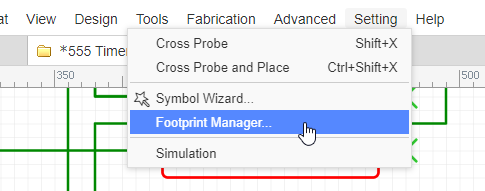
There are two ways to open the footprint manager:
Click top menu, via: Top Menu - Tools - Footprint Manager
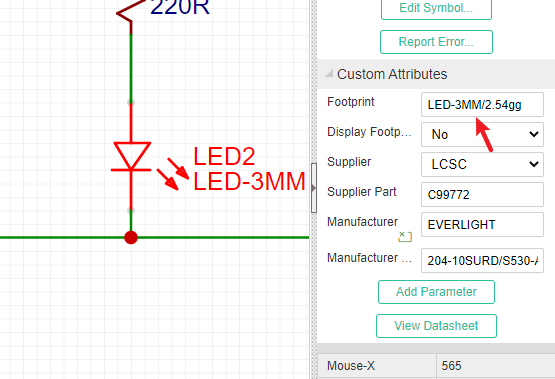
Click the footprint input box of custom attributes when you've selected a component:
1. Footprint manager will check your parts footprint correct or not automatically when open it.
If the part without the footprint or this footprint doesn't exist in EasyEDA Libraries, or if the part's Pins doesn't correspond the footprint's Pads correctly, the footprint manager will show the red background alert.
For example, If your part D1 has 2 pins,
- pin numbers are
1and2, - pin names are
AandC,
but you assigned a footprint has 2 pads,
- pad number are
AandC,
but the part's pin number doesn't match the pad number, so the the footprint manager will alert red background: 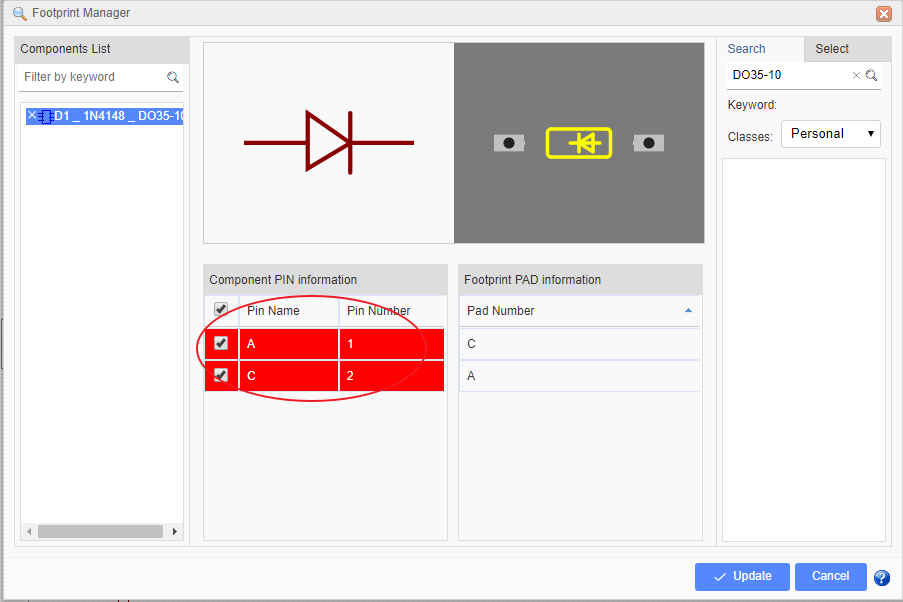
In order to solve this:
method 1: change part's pin number from 1 and 2 to A and C.
method 2: change footprint's pad number as 1 and 2. That needs the footprint is created by you. And you can't change the Pad number in footprint manager, you need to find out the footprint at "Library > Footprints > Work Space", and then edit it.
method 3: find an other footprint and update.
2. In the preview area, you can zoom in, zoom out and pan with mouse scroll button. 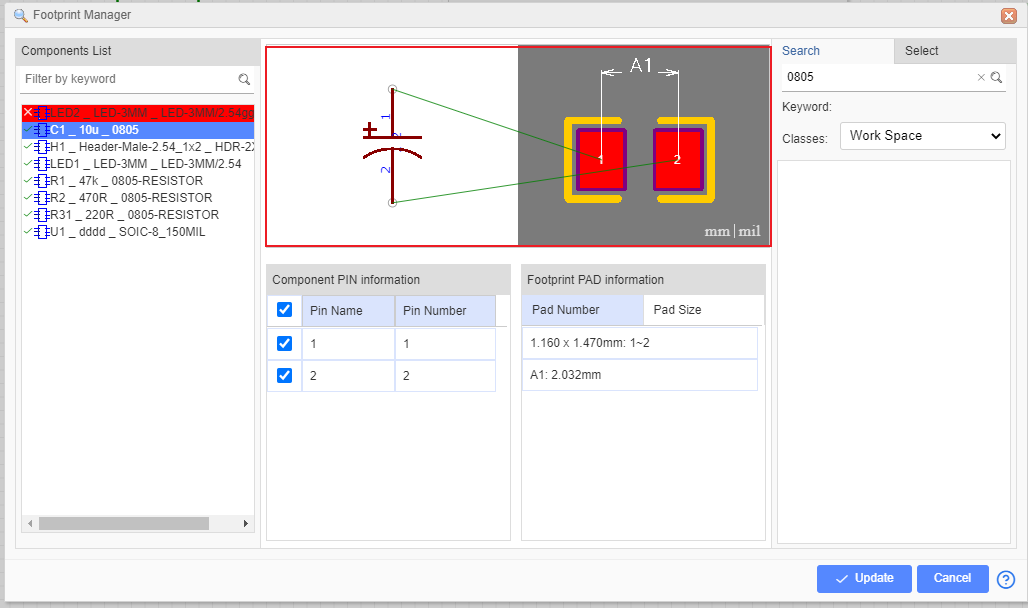
Component PIN Information: And you can modify component's pin map information in here.
PCB PAD Information:
- Pad Number: You can check the footprint's pad number, but you can't modify it. when you select the component on the left side, it shows component's footprint pad number, if you selected a footprint which is searched or selected from the classes, it will show the selected footprint's pad number.
- Pad Size: You can check the footprint's pads size and distance, it same as "Check Dimension" tool of footprint editor. Click the preview area unit text to change size unit.
Update footprint
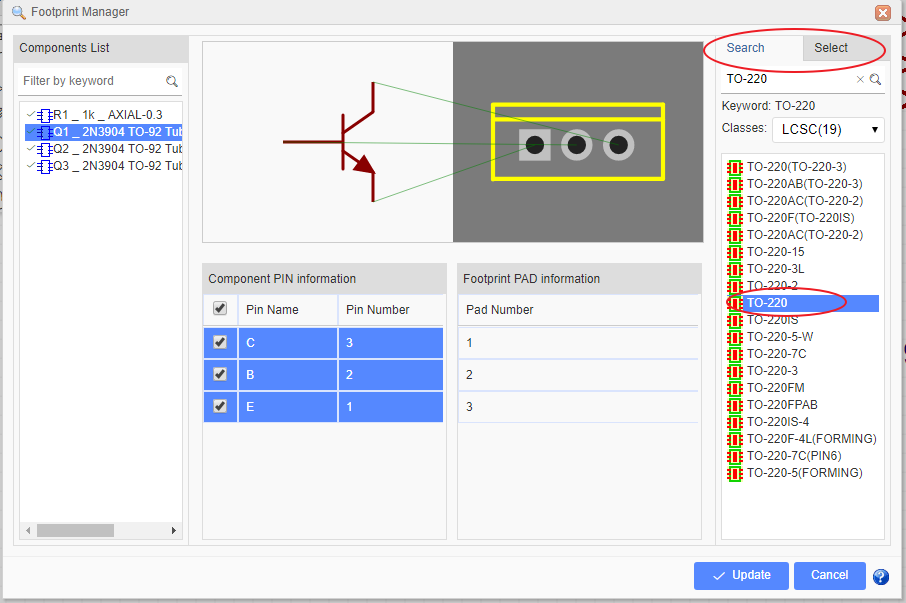
If you want to change the footprint, for example, select a component such as Q1, from TO-92 TO TO-220, you just need to click in the footprint input box. EasyEDA will popup the footprint manager dialog. You can follow the instructions.
- Type TO-220 into the search box and search, Or change to Select tab,
- Select the classes you want and select TO-220 footprint,
- Verify it in the preview box,
- then press the Update button.
After that you will find you have changed the footprint to TO-220.
Note:
To ensure that you use a footprint type that is already in the EasyEDA library, it is recommended that you use this technique to change component footprints rather than just typing a footprint name directly into the footprint text input box.because of the footprint manager will add the footprint's global unique ID into the schematic when the footprint updating.
When you select a subpart, the others subparts will be selected too, so they will update the footprint together.
If the part's property "Convert to PCB" is set as "No", it will not appear at footprint manager.
Update in Batch
If you want to batch modify components' footprints,
- In the footprint manager dialog, you can press
CTRL + clickorSHIFT + selectto select the components, and then select the footprint to update. - In schematic canvas, you can frame select the commponents as you want, and then click the "footprint" attribute input box at the right-hand property panel.
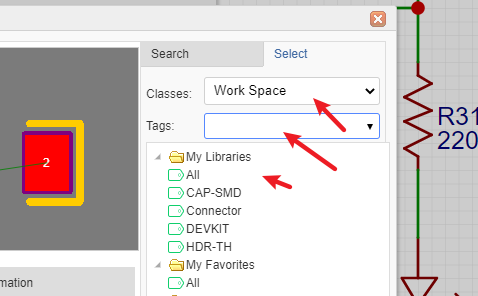
To use your own footprints, you can select Work Space under the Select tab.