Schematic Canvas Setting
During this tutorial we will create a simple Schematic design to guide you in using EasyEDA Schematic capture.
You can find the canvas Properties setting by clicking on any the blank space in the canvas.
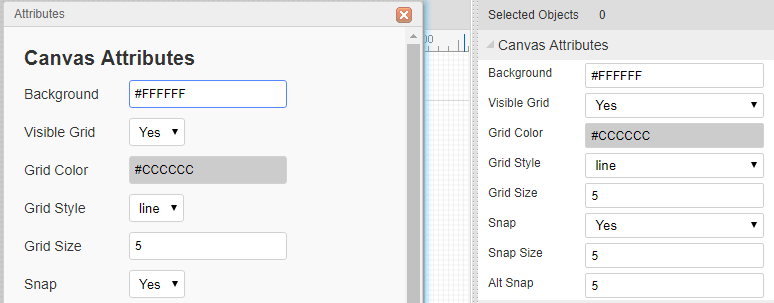
As described earlier, background and grid colours and the style, size, visibility and snap attributes of the grid can all be configured.
The canvas area can be set directly by the Width and Height or by using the available preset frame sizes.
Grid:
Visible Grid : Yes or No
Grid Color: Any valid colour
Grid Style: Line or Dot
Grid Size: To ensure proper alignment of all EasyEDA parts, it is advisable to set in 10, 20, 100. the unit is pixel.
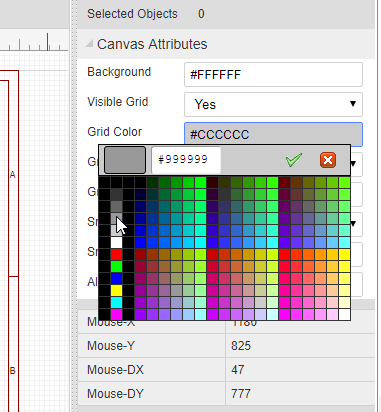
Grid (and background) colour can be set directly by entering the hexadecimal value of the colour you want or by clicking on a colour in the palette that opens when you click on the colour value box:
Snap:
Snap: Yes or No. Pressing this key toggles switching snap to grid on and off.
Snap Size: To ensure proper alignment of all EasyEDA parts, it is advisable to set in 10, 20, 100 but any valid number can work, such as 1, 5, 10.
It is strongly recommended that you keep Snap = Yes all the time. Once items are placed off-grid it can be very difficult to reset them back onto the grid. Off-grid placement can result in wires looking as though they are joined when in fact they are not and so causing netlisting errors that can be hard to track down.
If you need to draw detailed parts of new symbols or footprints that need to go between grid points, try to reduce the grid spacing to draw these elements and then reset the grid back to your chosen default value as soon as you have completed that part of the drawing. Setting Snap=No should only really be used as a last resort.
- ALT Sanp: Snap size when pressing the
ALTkey.